So. Want to see how to turn a ugly old nicotinestained lampshade in to a bright new fancy one?
Just follow along!
The wall arm is at my mother-in-law's, waiting to be painted a bright applegreen so you will have to wait for pictured of that. In the meantime we will fix the shade.
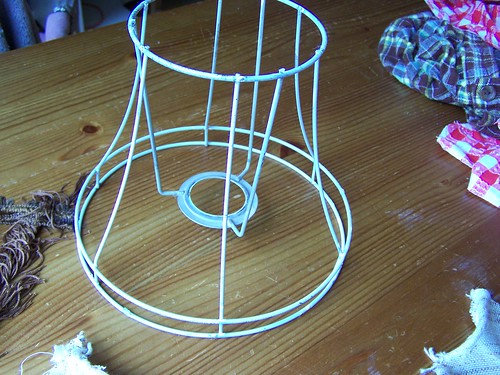
Look at that! Brown, smelly, so old it disintegrates when you touch it. This *really* needs a make over. I grabbed an arm full of scraps off the fabric shelf, not sure what I would use.
I guess any fabric will do as long as it isn't too thick and/or too dark. It still need to let some light shine through.
It also might be wise to stay away from fabric that is easy flammable, for obvious reasons!
I also found some ribbon in my craftscupboard. Ribbon doesn't only look nice but it also is a great way to hide stitching or other irregularities, making it easier to fix the fabric to the frame without worrying about neat seams.

First we need to strip the old fabric of the frame. As with all re-upholstery it is always easiest to use the old fabric as a template so make sure you rip the seams carefully. A seam ripper (tornmesje) is a great tool for this.

I gently ironed the old fabric.
Please put a towel or something like that between your iron and the old fabric as you have no way of knowing if the old fabric isn't made of some icky synthetic fiber that will melt to your iron.
As you can see my shade was made using two pieces of fabric. Some shades are made of one piece, some are made of six or more pieces. Anything is possible, I guess!
You now have to decide how many pieces you want your shade to be made of. The easiest way is to check your frame and see how many ribs and facets it has. I find it looks best if the seams between seperate pieces of fabric fall right on top of the ribs so every facet of the shade is made of a smooth piece of fabric.
My shade has six facets and I choose to use three pieces of fabric, each one spanning two facets. I could alsof have used six pieced of fabric, or two. Just use the old fabric as a template and make sure to incorporate a seam allowance!
If you look closely at the pieces of old fabric you will probably see a crease or some discoloration where the fabric was stretched over the ribs. You can use those lines to cut a template for your new fabric.
Again, make sure to check your seamallowances! If you just use the old fabric as a template without altering it in any way then you don't have to worry about it since the seam allowance is allready incorporated. But otherwise you have to put a seamallowence on the sides which you have cut.

I used the template made from the old fabric to cut three pieces new fabric. I cut it on the bias which is just a fancy word for the way you cut your fabric.
Normally you use fabric in such a way that the individual vertical and horizontal threads the fabric is made of go from top to bottom and from left to right.
However, if you cut on the bias you make sure that the threads are placed diagonally.
This gives a nice stretch to the fabric and in the case of a lampshade it can help the fabric to stretch smoothly around the frame.
If, however, you have a scrap of fabric that is too small for a bias cut or you just don't want to bother with it that is perfectly fine. Your shade will still look lovely.
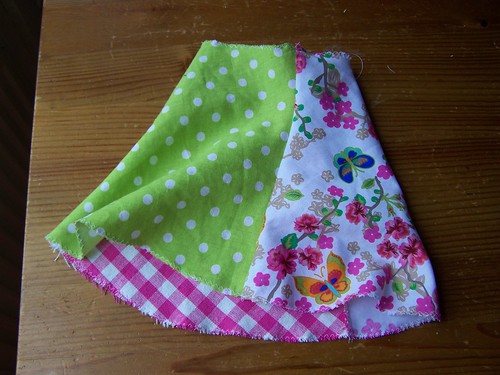
I pinned and stitched the pieces together, right sides facing each other. After that I went around all the raw edges with a zig zag stitch to stop it from fraying. Please don't skip this as you will later stretch the fabric over the frame which puts a lot of tension on the seams.
After stitching and zigzagging (or serging if you are a lucky guy or gal!) you'll end up with a miniskirt for your shade.
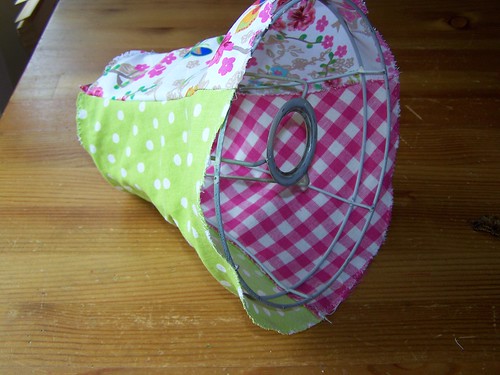
Put it over the frame and see if it fits. It doesn't have to fit really tight since it will tighten a lot when you fasten it to the frame.

Fold over the upper edge and pin it in place.
With a double thread of yarn stitch stitch around the edge. I used a simple running stitch. If you plan on using lace or ribbon or any other form of decoration around the edges then it doesn't matter how the stitches look. Otherwise you might want to put some consideration in color and form of your stitches.

Do the same for the lower edge, this time making sure you stretch the fabric.
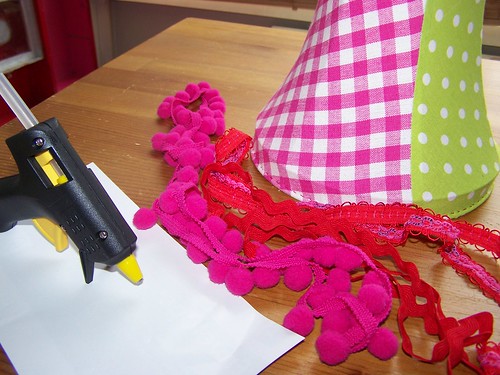
Now comes the fun! Using a proper glue (I used a hot glue gun) adorne your shade with ribbon, lace or anything else you like.
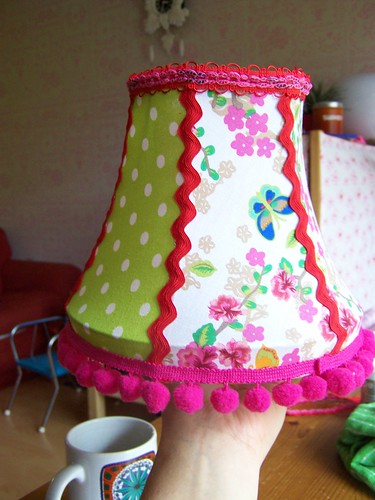

Voila! More to in a couple of days, when I'm going to paint the wall arm.
ik zie rose, ik zie groen, ik zie een heel leuk lampekappie!
ReplyDeletegroetjes,
sandra