
Friday, 17 September 2010

Thursday, 16 September 2010
Birthday boy
My little nephew is almost one year old. I can't believe a whole year has passed since I was doing some nervous shopping while talking to my brother in law through the phone, hearing my poor sister in labor on the background.

You can't imagine the phone bill of that month, my sister living in Denmark and all that!
I never knew it is possible to love someone else's child as much as you love your own but it is. Too bad he lives 800 kilometers away...
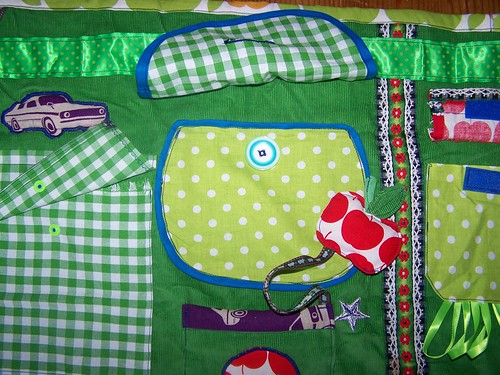
This special birthday boy deserves a special present so I, again, dug up some matching fabric and stuff out of the craft cabinet.
I'm not sure what it will be, he is a bit young for an awesome cozy car caddy so I'm leaning toward a rollable storage-/playingmat with different six pockets with different methods of closing.
What would you make?
Project bedroom, part 2
With still a few euro's left from selling all the grown out clothes I went to the last 'stoffenspektakel', here in Gouda.
Given the fact that my daughters are not the kind of girls that leave decorational objects in their original place or state I thought that a quilt would be the perfect way to give some color to their bedroom.
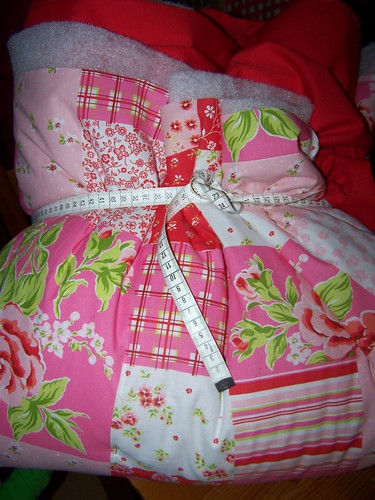
However, there is at the moment neither time nor will to assemble a whole quilt (let alone the fact that this is supposed to be a low budget project!) so I cheated and bought this cute fabric.
It is 260 cm wide so a cut of 180 cm long will (turned 90 degrees) make a nice cover for the bed. Without having to worry about putting smaller piecer together.

All it needs now is some backing and filling.
Simple red cotton and some leftover polyester wadding will work great for a light bedcover.
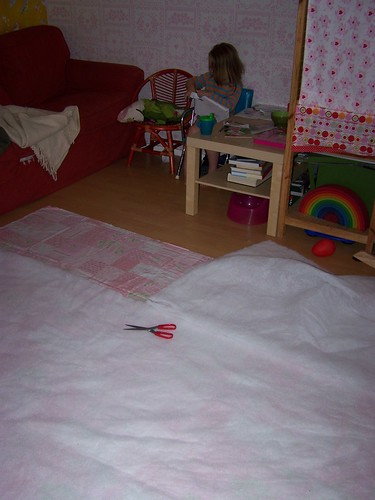
I'm in no way an expert on quilting. I like making blankets and covers and in some ways it resembles a quit but I also like to cheat and use methods or tools that are probably considered sacrilege to *real* quilters.
Using up the whole floor of our livingroom (which says more about the size of the room than of the size of the quilt) I put the three layers of upper fabric, polyester wadding and lining on top of eacht other and pinned them together.
It is now waiting for me to first baste them together and then machinestitch around all of the printed squares on the fabric, making it look as if I worked hard and made the whole thing from scratch.
So, if you are a real quilter I apologize for using the word quilting for something that is probably nothing more than a simple bedcover.
But then again, my fingers will not hurt from sewing millions of tiny stitches by hand, I will not have to pay a hundred euro's for designerfabrics and I will still have time for other projects.
Don't be hatin!
Friday, 10 September 2010
Bright light, a tutorial
So. Want to see how to turn a ugly old nicotinestained lampshade in to a bright new fancy one?
Just follow along!
The wall arm is at my mother-in-law's, waiting to be painted a bright applegreen so you will have to wait for pictured of that. In the meantime we will fix the shade.
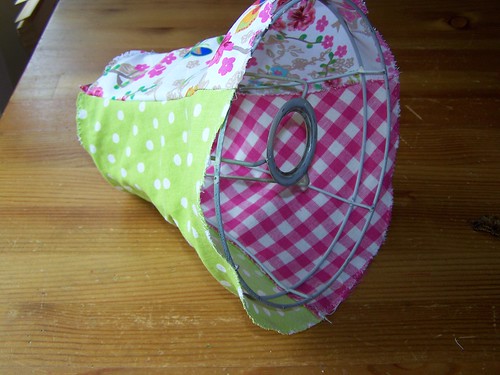
Look at that! Brown, smelly, so old it disintegrates when you touch it. This *really* needs a make over. I grabbed an arm full of scraps off the fabric shelf, not sure what I would use.
I guess any fabric will do as long as it isn't too thick and/or too dark. It still need to let some light shine through.
It also might be wise to stay away from fabric that is easy flammable, for obvious reasons!
I also found some ribbon in my craftscupboard. Ribbon doesn't only look nice but it also is a great way to hide stitching or other irregularities, making it easier to fix the fabric to the frame without worrying about neat seams.

First we need to strip the old fabric of the frame. As with all re-upholstery it is always easiest to use the old fabric as a template so make sure you rip the seams carefully. A seam ripper (tornmesje) is a great tool for this.

I gently ironed the old fabric.
Please put a towel or something like that between your iron and the old fabric as you have no way of knowing if the old fabric isn't made of some icky synthetic fiber that will melt to your iron.
As you can see my shade was made using two pieces of fabric. Some shades are made of one piece, some are made of six or more pieces. Anything is possible, I guess!
You now have to decide how many pieces you want your shade to be made of. The easiest way is to check your frame and see how many ribs and facets it has. I find it looks best if the seams between seperate pieces of fabric fall right on top of the ribs so every facet of the shade is made of a smooth piece of fabric.

My shade has six facets and I choose to use three pieces of fabric, each one spanning two facets. I could alsof have used six pieced of fabric, or two. Just use the old fabric as a template and make sure to incorporate a seam allowance!
If you look closely at the pieces of old fabric you will probably see a crease or some discoloration where the fabric was stretched over the ribs. You can use those lines to cut a template for your new fabric.
Again, make sure to check your seamallowances! If you just use the old fabric as a template without altering it in any way then you don't have to worry about it since the seam allowance is allready incorporated. But otherwise you have to put a seamallowence on the sides which you have cut.

I used the template made from the old fabric to cut three pieces new fabric. I cut it on the bias which is just a fancy word for the way you cut your fabric.
Normally you use fabric in such a way that the individual vertical and horizontal threads the fabric is made of go from top to bottom and from left to right.
However, if you cut on the bias you make sure that the threads are placed diagonally.
This gives a nice stretch to the fabric and in the case of a lampshade it can help the fabric to stretch smoothly around the frame.
If, however, you have a scrap of fabric that is too small for a bias cut or you just don't want to bother with it that is perfectly fine. Your shade will still look lovely.
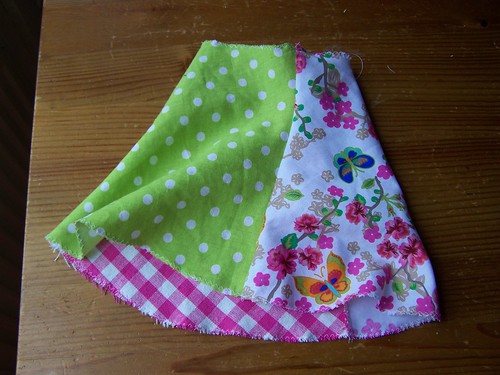
I pinned and stitched the pieces together, right sides facing each other. After that I went around all the raw edges with a zig zag stitch to stop it from fraying. Please don't skip this as you will later stretch the fabric over the frame which puts a lot of tension on the seams.
After stitching and zigzagging (or serging if you are a lucky guy or gal!) you'll end up with a miniskirt for your shade.
Put it over the frame and see if it fits. It doesn't have to fit really tight since it will tighten a lot when you fasten it to the frame.

Fold over the upper edge and pin it in place.
With a double thread of yarn stitch stitch around the edge. I used a simple running stitch. If you plan on using lace or ribbon or any other form of decoration around the edges then it doesn't matter how the stitches look. Otherwise you might want to put some consideration in color and form of your stitches.

Do the same for the lower edge, this time making sure you stretch the fabric.
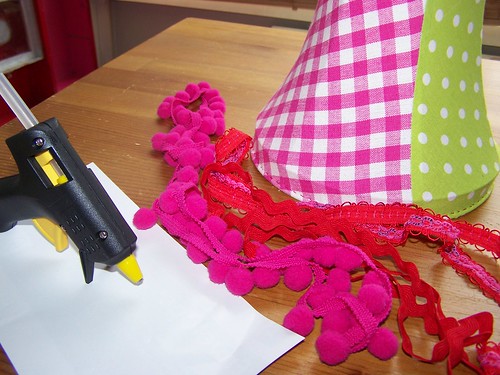
Now comes the fun! Using a proper glue (I used a hot glue gun) adorne your shade with ribbon, lace or anything else you like.
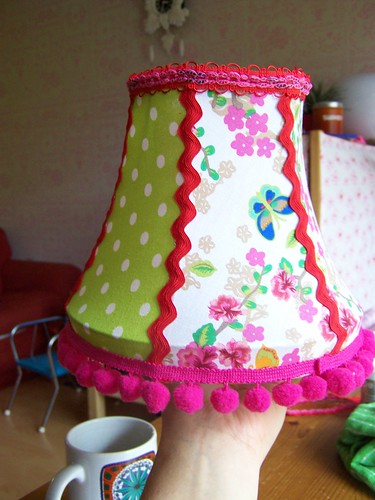

Voila! More to in a couple of days, when I'm going to paint the wall arm.
Project bedroom, part 1
We are a co-sleeping/bed-sharing family but now that our youngest daughter is growing towards shorter daytime naps and longer nighttime sleep and our eldest has started school we feel the need for another bedroom.
My goal is to at least give them to opportunity to sleep in their own room if they want to and I want a place where I can nurse the youngest to sleep while 4701 is bringing the eldest to bed.
But since both girls will probably sleep with us for most of the time the next couple of years I would really like their room to also serve as a guest room.
Bunk beds would probably be the most logical option but since our girls are used to sleeping close to their parents and each other I opted for a "twijfelaar", which is 120 cm wide and 190 cm long. Perfect for two girls but big enough for a parent when needed or adult guests with or without children.
Our budget for all of this is tiny (read: non-existing) so I need to find other ways to fix it all. The walls and floor are in good condition and there is a wall wide shelf unit so the only things needed are a bed and some decoration.
First step was to make some money! I've sorted out all of our clothes (finally, I have been dreading that for years!), threw out two thirds of it and sold the other third. So now I have a tiny budget which I think is awesome because it makes you think in creative ways instead of just going on a shoppingspree (which is also nice, of course ;) )
I've found a really nice bed at a local thrift store. It is standing in my mother-in-law's garage at the moment so I can paint it without the children running in to it. I've allready picked out a nice grannysmith-green for it. Lovely, I like it when old furniture has a modern color!
I also picked up a really horrible looking wall-lamp at the thrift store because the style fitted the bed perfectly.
While the style fitted the bed, the color didn't. But now it does! Want to follow along to see how I did it? I'll make a new blogpost for it
Subscribe to:
Posts (Atom)